29.6.14

deconstruction of a porch


A handful of years ago, old man Hensley and myself were ramblin' on and on about front porches. At the time, MJ and i were living in the house on harvest moon which was seriously lacking in the front porch department. In fact, most every house in that ol' neighborhood was lacking any real sit-and-spin-while-sippin-on-sweet-tea type of front porch. I talking about the kind of front porch from which you say howdy to your neighbors. Old man Hensley and i had a theory that most folks living in such neighborhoods preferred to drive their cars into their garages, disappear inside and spend their afternoons hiding from one another behind privacy fences. In all honesty, there were seasons in which MJ and i needed to do just that. But when those seasons came to an end, we often found in difficult to engage with or even get a simple greeting from those dwelling within our immediate vicinity. 


I ramble on with this boring account simply to punctuate how important it became that we have a big front porch attached to whatever house in which we eventually decided to move. Our blessed beast that we purchased a year ago did indeed have a sizable front porch, but it just so happened to be enclosed with windows, a door, and a general vibe of unwelcomeness. Seeing as how our home presently has no garage or outdoor storage of any sort, the enclosed front porch served as a handy locale to store unused scraps of drywall, unmotorized people-moving devices, and future bathroom amenities. However, we always knew that time was short for that enclosure and that one day we would have a big open front porch from which we could wave to our neighbors and shout good-natured insults back and forth.

Then, one day, MJ says something like, "Why don't you go ahead and make yourself useful by taking busting the hell out of our front porch." I know that doesn't sound like her, but that's the way i like to remember it. And so we went to work. We ripped out everything that wasn't part of the original porch structure and broke it down for heavy trash pickup which the city of Greenwood has every last friday of the month.


Yowzers.


Here's a side view before...


and after.


Clearly, we've still got a long way to go, but we're a half a step closer to transforming this beast into the home we envisioned that it could be when we first walked into it a little over a year ago.

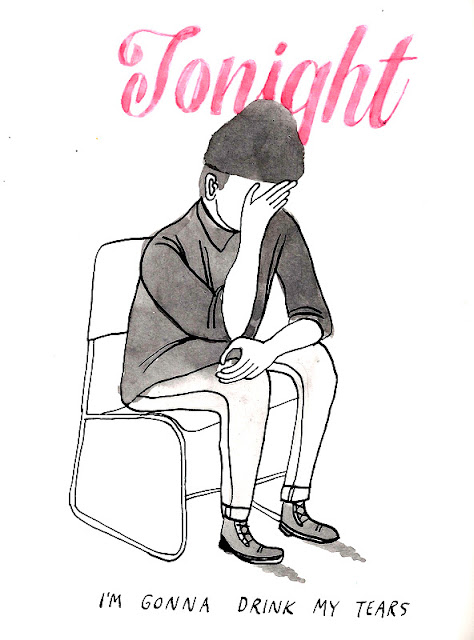
Good night, old man Hensley, wherever you are.

(family photo by the one and only Katie Basbagill)

22.6.14

closets are nice


I don't mean to brag, but as far back as i can remember, closets have been something that have been present in my life. There was a brief period in college when i lived in a makeshift room added on to a less-than-sound house in muncie, indiana in which i did not have a closet. None of this is a euphemism for anything. This is just closet-talk, man. But i digress. Anywho, you learn to take a thing like a closet for granted. After living out of a dresser and laundry baskets during the past year, one might imagine how stoked MJ and i were at the prospect of finally having our own closet in which to hang clothing once again. You know that thing that they say about the little things? Well, i'm not going to argue with whoever they are that say that, because, hey... closets are nice. Am i right? You don't have to answer that. I've now learned to never take a closet for granted again.


Our master bedroom (formerly the "green room") came equipped with a useless secondary furnace housed within its closet. In the previous photo featuring me in a dust mask you can see the return vent that was connected immediately to the unit behind the closet wall. You may notice in the photo directly above that the aforementioned return vent was removed (along with that hunk of scrap metal) and replaced with drywall. Nice patch, eh?


Now we're starting to see less and less of that pea puke green and more and more woodgrain. With a fresh coat of paint on the wall you'd never know there was once a return vent in the mix. It's not black magic, kids. It's just a little elbow grease and mostly raw talent. Now, let's open up that closet and take a look inside. Shall we?


Sadly, i haven't been able to dig up any shots of the crumbling disgusting plaster that once covered the inside of the closet. However, you can see from the "before" photo that i masterly removed said plaster revealing the lath beneath and a glimmer of the someday-bathroom on the other side of the wall. Notice the fresh gypsum in the "after" shot. Tasty, right?

Now, if you'll allow me to give you a peak at the inside of the closet. Again, i'm disappointed to say that there are no photos of the preexisting furnace. Still, if you look at the next "before" shot, you can see the supply and return ducts which we put through ceilings and floors to connect everything in the attic to our single furnace living in the basement. The ductwork fit just snug between that there ol' coal chimney and the closet wall. In order to squeeze everything between the floor joists, we even had to manufacture our own pieces out of scrap sheet metal. Mr. Mike once again helped us out with figuring out that piece of the puzzle.  


I then built a wall with some two-by-fours and gypsum board to cover the monstrosity and patched the floor with some salvaged floor planks.

After refinishing the floors, more paint, putting up some baseboards, etcetera, our brand new closet was finally ready to move in to...


Huzzah!

A few brackets, hand-cut shelves, and steel rods later, we had a place to hang clothes. In the next shot you can really see that new wall (baseboard and all) that hides the new ductwork...


On the other wall directly across there's a little nook in which we hung some hand-cut shelves for our footwear to lounge upon.


Say it with me, people:

Closets are nice.

11.6.14

an able door


When we purchased our blessed beast, the door that you see before you was pea puke green and hung at the top of the staircase. The entire second floor had been converted in to and used as an apartment for quite some time before the house went into foreclosure and this door had closed off the upstairs from the downstairs. Restoring the house to a single unit, we knew we were going to remove the doorway. The doorway to our master bedroom, on the other hand, had no door of which to speak. Clearly, the solution was simple: Move the top-of-the-stairs door to the master bedroom.

Only a couple of problems stood in the way to making our solution a reality. 

First, the door was about an inch and a half too wide for the existing doorway to the bedroom. A capable circular saw took care of that problem. Second, there was a big ol' hole above the doorknob where once lived a deadbolt lock. A jigsaw, a scrap of wood, a couple of screws and few globs of wood putty later, it was if said hole had never existed. Never before had two problems relating to a door been so creatively solved.


We finished the job with a coat of espresso minwax ala the floors and a couple of coats of poly. We reused original hardware and hung that sucker in the doorway as if it had been there its whole lifetime.

Boom-shaka-laka.

Door. 


Coming soon...

Closets.

That's right...

Closets.


6.6.14

the purple room, part deux

Last week, you were treated to a peek at the renovation of our master bedroom/former "green room". Now, let us revisit the "purple room" of which we took at peek at earlier in the year. 


Here's the jane gals with our buddy phil who helped us purchase this blessed beast we now call home. This was pretty much how the room looked when we were first wooed by her majesty. The only trace of any color other than purple was the battered plaster hanging from the ceiling. We suspect that there once resided a deeply devoted fan of prince in this room. We respect that. However, the purple had to go. And go far far far far far away.


After we tried our hand at hanging drywall in the green room, we enlisted the help of mom & pop rockey, and again mr. helvie to put a fresh crown atop the purple prince's royal dome. This is shot of the room after the new drywall has been hung. I must say, it really felt like we knew what we were doing this time. After some heavy mudding and sanding, the ceiling was finished. We then repaired some of the bulging plaster walls by drilling holes and shooting liquid nails into the walls. After the liquid nails, we we screwed the plaster tight against the lath and let it dry. A mere hours later, boom-shaka-laka. Almost-like-new walls. The rest of the renovation (i.e. paint, floors, etc.) was pretty similar to the green room. So let's just skip to the "after" pictures...


Voila!

The kids have a new shiny room in which they sleep like darling babies.


I'd like to say that next week we will reveal the final upstairs room: the family bath. However, that will most likely be awhile. 

How about some refinished bedroom doors? 
You know you love pictures of doors.
Stay tuned for those doors.