22.6.14

closets are nice


I don't mean to brag, but as far back as i can remember, closets have been something that have been present in my life. There was a brief period in college when i lived in a makeshift room added on to a less-than-sound house in muncie, indiana in which i did not have a closet. None of this is a euphemism for anything. This is just closet-talk, man. But i digress. Anywho, you learn to take a thing like a closet for granted. After living out of a dresser and laundry baskets during the past year, one might imagine how stoked MJ and i were at the prospect of finally having our own closet in which to hang clothing once again. You know that thing that they say about the little things? Well, i'm not going to argue with whoever they are that say that, because, hey... closets are nice. Am i right? You don't have to answer that. I've now learned to never take a closet for granted again.


Our master bedroom (formerly the "green room") came equipped with a useless secondary furnace housed within its closet. In the previous photo featuring me in a dust mask you can see the return vent that was connected immediately to the unit behind the closet wall. You may notice in the photo directly above that the aforementioned return vent was removed (along with that hunk of scrap metal) and replaced with drywall. Nice patch, eh?


Now we're starting to see less and less of that pea puke green and more and more woodgrain. With a fresh coat of paint on the wall you'd never know there was once a return vent in the mix. It's not black magic, kids. It's just a little elbow grease and mostly raw talent. Now, let's open up that closet and take a look inside. Shall we?


Sadly, i haven't been able to dig up any shots of the crumbling disgusting plaster that once covered the inside of the closet. However, you can see from the "before" photo that i masterly removed said plaster revealing the lath beneath and a glimmer of the someday-bathroom on the other side of the wall. Notice the fresh gypsum in the "after" shot. Tasty, right?

Now, if you'll allow me to give you a peak at the inside of the closet. Again, i'm disappointed to say that there are no photos of the preexisting furnace. Still, if you look at the next "before" shot, you can see the supply and return ducts which we put through ceilings and floors to connect everything in the attic to our single furnace living in the basement. The ductwork fit just snug between that there ol' coal chimney and the closet wall. In order to squeeze everything between the floor joists, we even had to manufacture our own pieces out of scrap sheet metal. Mr. Mike once again helped us out with figuring out that piece of the puzzle.  


I then built a wall with some two-by-fours and gypsum board to cover the monstrosity and patched the floor with some salvaged floor planks.

After refinishing the floors, more paint, putting up some baseboards, etcetera, our brand new closet was finally ready to move in to...


Huzzah!

A few brackets, hand-cut shelves, and steel rods later, we had a place to hang clothes. In the next shot you can really see that new wall (baseboard and all) that hides the new ductwork...


On the other wall directly across there's a little nook in which we hung some hand-cut shelves for our footwear to lounge upon.


Say it with me, people:

Closets are nice.

11.6.14

an able door


When we purchased our blessed beast, the door that you see before you was pea puke green and hung at the top of the staircase. The entire second floor had been converted in to and used as an apartment for quite some time before the house went into foreclosure and this door had closed off the upstairs from the downstairs. Restoring the house to a single unit, we knew we were going to remove the doorway. The doorway to our master bedroom, on the other hand, had no door of which to speak. Clearly, the solution was simple: Move the top-of-the-stairs door to the master bedroom.

Only a couple of problems stood in the way to making our solution a reality. 

First, the door was about an inch and a half too wide for the existing doorway to the bedroom. A capable circular saw took care of that problem. Second, there was a big ol' hole above the doorknob where once lived a deadbolt lock. A jigsaw, a scrap of wood, a couple of screws and few globs of wood putty later, it was if said hole had never existed. Never before had two problems relating to a door been so creatively solved.


We finished the job with a coat of espresso minwax ala the floors and a couple of coats of poly. We reused original hardware and hung that sucker in the doorway as if it had been there its whole lifetime.

Boom-shaka-laka.

Door. 


Coming soon...

Closets.

That's right...

Closets.


6.6.14

the purple room, part deux

Last week, you were treated to a peek at the renovation of our master bedroom/former "green room". Now, let us revisit the "purple room" of which we took at peek at earlier in the year. 


Here's the jane gals with our buddy phil who helped us purchase this blessed beast we now call home. This was pretty much how the room looked when we were first wooed by her majesty. The only trace of any color other than purple was the battered plaster hanging from the ceiling. We suspect that there once resided a deeply devoted fan of prince in this room. We respect that. However, the purple had to go. And go far far far far far away.


After we tried our hand at hanging drywall in the green room, we enlisted the help of mom & pop rockey, and again mr. helvie to put a fresh crown atop the purple prince's royal dome. This is shot of the room after the new drywall has been hung. I must say, it really felt like we knew what we were doing this time. After some heavy mudding and sanding, the ceiling was finished. We then repaired some of the bulging plaster walls by drilling holes and shooting liquid nails into the walls. After the liquid nails, we we screwed the plaster tight against the lath and let it dry. A mere hours later, boom-shaka-laka. Almost-like-new walls. The rest of the renovation (i.e. paint, floors, etc.) was pretty similar to the green room. So let's just skip to the "after" pictures...


Voila!

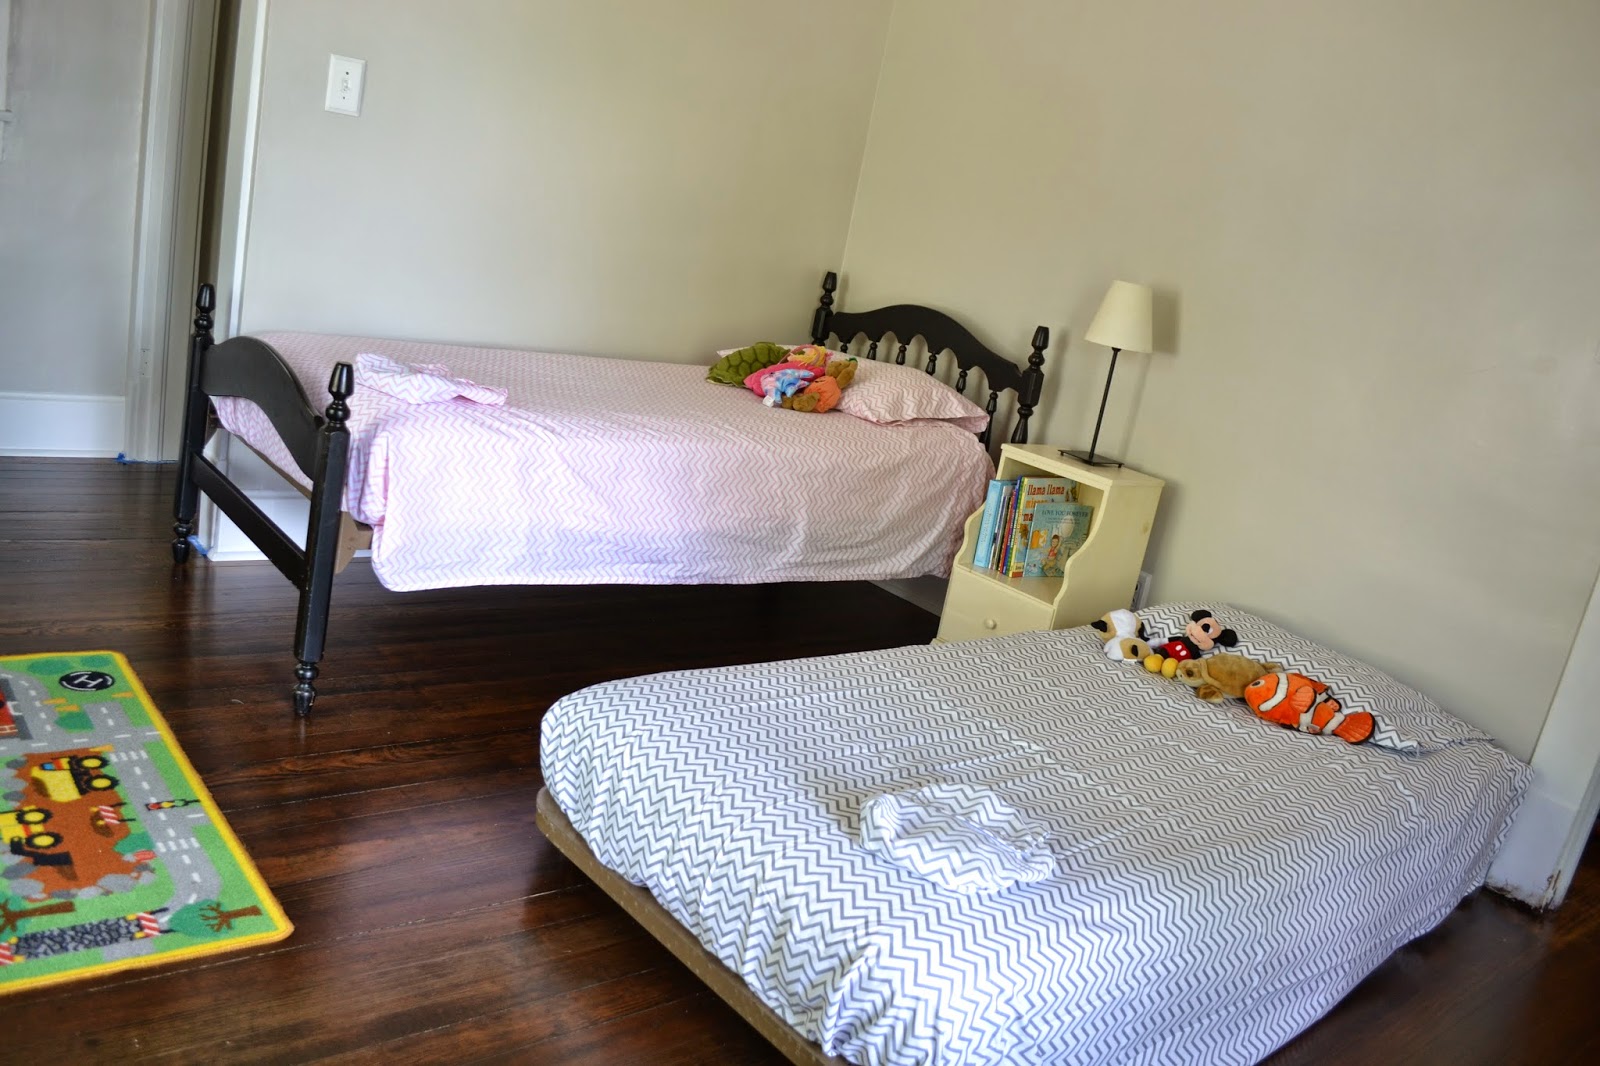
The kids have a new shiny room in which they sleep like darling babies.


I'd like to say that next week we will reveal the final upstairs room: the family bath. However, that will most likely be awhile. 

How about some refinished bedroom doors? 
You know you love pictures of doors.
Stay tuned for those doors.

31.5.14

there are people sleeping upstairs


When our tiny tribe first took a tour of our soon-to-be home/project one year ago, this is how our future master bedroom appeared. Everything but the carpet, ceiling accoutrements, and window panes were painted pea puke green. The ceiling was paved with tiles glued to lath. In the center of the ceiling was an unattractive, improperly installed ceiling fan. I'll spare the description of the non-functioning secondary furnace in the closet. Suffice it to say it no longer resides at this address and has most likely been torn limb from limb to create robots that will one day become sentient and return to our finally renovated home to exact their revenge. But i digress. Let me walk you briefly through the year-long process of transforming the affectionately named "green room" into a place that we can finally designate "mommy & daddy's room".


The first thing we had to do in this future sanctuary was to remove those unfortunate tiles. This proved a rather easy task as they were barely hanging on for dear life as it was. Eventually, we also got around to knocking down that ceiling fan that was merely bolted to a ceiling joist. I don't know if i've mentioned it before, but let me just get this out of the way now before we proceed any further: our home is FULL of things that were done less than properly. Ceiling fan installation should really be the least of our concerns. Remember that furnace in the bedroom closet that i mentioned earlier? Yeah, i know! Carbon monoxide, right? Oh well.


Once the ceiling was stripped to the bones, we were ready to learn how to hang drywall. Fortunately, we had a lift supplied by brother ben and the able hands of ben himself, brother jeremy, mister mike, and the affable ryan helvie (pictured above heavily critiquing our craftsmanship while MJ wonders to herself why i'm just turding around with my camera instead of making myself useful. jk, y'all). By the by, have i mentioned how incredible and generous our friends and family are? That's right; i just did.


Just look at that drywall glisten. Once we muddled our way through this room, we only got better at hanging that stuff throughout the remainder of the house. While the "green room" was the first room in which we hung drywall, it was the second that we finished with mud, tape and sandpaper. MJ and i discovered that we might just have a real knack for finishing drywall. Here's a shot of the finished ceiling, paint and all, with a new fan. We customized a discounted hunter fan by giving a paint job to the blades and fitting the lights with frosted white globes.


Also notice that the pea puke green is slowly dissolving beneath layers of paint primer. I believe the carpet has been ripped up and tossed out the windows by this point as well. Something is definitely taking shape. I haven't even mentioned all of backstage work. There are hours and hours of electric rewiring, insulation removal, and ductwork installation behind those walls and ceiling. 


Finally, we sanded down those floors to the grain. We stained them with minwax espresso and coated them with four rounds of polyurethane. The walls got a touch of grey as a final treatment and all of the trim painted white as snow.

Now, for the moment you've been holding your breath for...


Go ahead, breathe...


It's just one room in a whole house that needs a whole lot of love...


However, it is a HUGE victory for us...


So here it is...


TA-EFFING-DA!

If one looks rather closely, one will notice that the window sashes alone retain the pea puke green. We've been saving those for our final decision about keeping or replacing all of the original windows throughout the house. Also, the undepicted doors are presently being stripped and sanded to be refinished similar to the floors. However, i think you get the idea.


Here's a shot of the window across from our bed where our old library desk now has a functional place of residence in our home. The poor thing has been relegated to a closet for far too long. It's time for her to shine like the shiny diamond she was always meant to be.

Here we are.
One year later. 
We're finally upstairs.
It feels pretty great.

22.4.14

illustrations for life


 Our efforts in restoring our home continue to excite us and frustrate us simultaneously. I've been hoping to post some before/afters of the upstairs when we've reached the point of finally being able to use it as living space. It's definitely getting there, but difficulties with giant floor-sanding machines have left us in a holding pattern once more.

Drawing inspiration from newspapers continues to push me to seek the weird among the bizarre. No doubt, one day we will all find a home.


16.4.14

pet sounds


Tis the season for applying bunny ears to your canine pals. 
Enjoy this magic moment.

18.2.14

groove crews


We at the rockey home are just coming down from our weeklong recuperation from our weeklong vacation from working on ye olde homestead. It's been difficult to get back into the groove, but if we're going to prove our love we're going to have to get up on our feet and step to the beat. Boy, that's what it will be. 

In other news, the sun is shining and the mammoth icicles hanging from our home are melting and falling and making terrifying yet glorious noises. They fall with an unsuspecting rhythm that would make lovers of street dancing hoodlums. It feels enough like spring that miranda is cleaning house whilst i draw and scan images for a secret forthcoming collaboration. The introspective couple that you see illustrated here have nothing to do with any of that. Dig it, you wild and free bohemians.